Posts

Showing posts with the label ReactJs

Understanding and Implementing Schemas in Python

Understanding and Implementing Schemas in Python Introduction In the world of programming, particularly in the context of data management and validation, schemas play a vital role. A schema is essentially a blueprint or a predefined structure that defines the expected format, data types, and constraints for a given data entity. In this blog, we will delve into the concept of schemas in Python, exploring what they are, why they are important, and how you can implement them in your projects. What is a Schema? A schema serves as a contract between different components of a system, ensuring that data is consistent, valid, and well-structured. It defines the rules for how data should be organized, what fields it should contain, and what types of values those fields can hold. In essence, a schema acts as a set of rules that data must adhere to in order to be considered valid. Why Are Schemas Important? Data Validation: Schemas provide a way to validate incoming data. When data is received o...

Code Splitting in React Js

Code Splitting in React Js   Code splitting is an essential technique that helps improve the performance and user experience of a React.js application. It involves splitting up your code into smaller, more manageable chunks, which are then loaded on-demand, rather than all at once. This reduces the initial load time of your application, allowing users to access the page more quickly and efficiently. In this blog, we'll explore what code splitting is, why it's important, and how to implement it in a React.js application. What is Code Splitting? Code splitting is a technique used to improve the performance of web applications by dividing the application code into smaller, more manageable chunks. By splitting the code, we can load only the necessary code to render the initial page, and then load additional code as needed when the user navigates through the application. This reduces the initial load time and improves the user experience. Why is Code Splitting Important? Code splitt...

useEffect hooks in React Js

useEffect hook in React Js   React is a popular JavaScript library used for building user interfaces. One of its core features is the ability to manage the state of a component, which allows for dynamic and interactive user experiences. One important tool for managing component state is the useEffect hook. The useEffect hook allows developers to perform side effects in a functional component. Side effects are operations that affect the environment outside of the component, such as fetching data from an API or updating the title of the webpage. The useEffect hook is similar to lifecycle methods in class components, but it is more flexible and easier to use. The syntax for the useEffect hook is simple: useEffect(() => { // side effect code here }, [dependencies]); The first argument to the useEffect hook is a function that contains the side effect code. This function will be executed every time the component renders, unless a second argument is provided. The second argument is a...

Simple todo app using ReactJS and Recoil

Simple todo app using ReactJS and Recoil First, you'll need to install the Recoil package: npm install recoil Next, create a new file called TodoItem.js with the following code: import React from 'react'; import { useRecoilState } from 'recoil'; import { todoListState } from './TodoList'; function TodoItem({ item }) { const [todoList, setTodoList] = useRecoilState(todoListState); const deleteItem = () => { const newList = todoList.filter((todo) => todo.id !== item.id); setTodoList(newList); }; return ( <div> <input type="checkbox" checked={item.isComplete} /> <span>{item.text}</span> <button onClick={deleteItem}>Delete</button> </div> ); } export default TodoItem; This code defines a new component called TodoItem that takes in a item prop representing a single item in the todo list. The component renders a checkbox, the text of the todo item, and a d...

Prop drilling in React Js

Image
Prop drilling in React Js In this post, we will discuss about Prop drilling in React Js. In order to understand useContext hooks in react js, first we should know Prop drilling. Basically, props are passed to component via HTML attribute. Passing props within a tree of a components is known to be Prop drilling. Prop drilling The above image describe the problem of prop drilling. The top component "ComponentA" and bottom component "ComponentD" are accessing the actual state but both middle components "ComponentB" and "ComponentC" are just passing state. This is actually problem of Prop-Drilling. Sample code: import   React , {  useState  }  from   'react' ; export   default   function   App () {    return  (      <>        < h1 > Prop Drilling </ h1 >        < ComponentA   />      </> ...

Controlled Component in React Js

Image
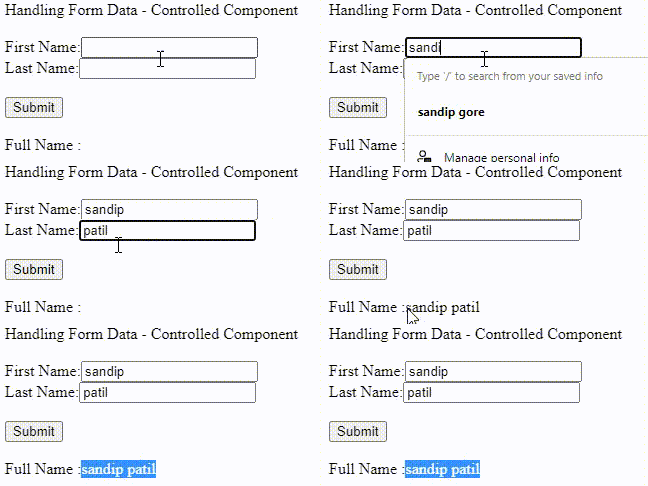
C ontrolled Component in React Js In every web application, handing form data is very basic requirement and if you want to handle this requirement in react Js, it provides two ways controlled component and uncontrolled component . According to official document of React Js, it is recommended that in most of cases, controlled component should be implemented for Forms, but in this post, we will discuss about controlled  component. In controlled component, Form data is stored in component's state and updated by "onChangeHandler" We can use single event handler for handling all form fields, regardless of type.    Controlled Component in react js Sample Code: A) Class Component   a) App.js import   React , {  Component  }  from   'react' ; class   App   extends   Component  {    constructor ( props ) {      super ( props );      this . handleSubmit  =  this ....

Uncontrolled Component in React Js

Image
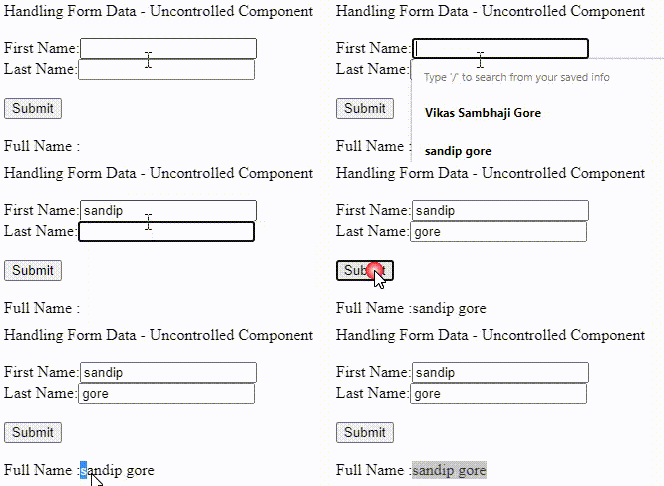
Uncontrolled Component in React Js In every web application, handing form data is very basic requirement and if you want to handle this requirement in react Js, it provides two ways controlled component and uncontrolled component. According to official document of React Js, it is recommended that in most of cases, controlled component should be implemented for Forms, but in this post, we will discuss about uncontrolled  component. Basic Difference between controlled and uncontrolled component: a) In a controlled component, form data is handled by a React component. b) In a uncontrolled component, form data is handled by the DOM itself. Uncontrolled Component in React Js Default Values: With an uncontrolled component, if you want to specify the initial value, you can specify a defaultValue attribute instead of value. Sample Code: A) Class Component   a) App.js import   React , {  Component  }  from   'react' ; class   App   extends ...